The romantic vision of a fixer-upper often masks the financial nightmare of catastrophic structural failure. The key to survival is not just having a contingency fund, but learning to diagnose problems like a forensic engineer before you even make an offer.
- Most structural issues are interconnected; a “simple” roof leak is often the first step in a destructive path that ends with a failed foundation.
- Generic contingency rules (like 10%) are dangerously inadequate for older homes. A realistic budget is based on a risk assessment of the home’s specific age and systems.
Recommendation: Prioritize repairs based on “structural triage”—addressing the root cause of destructive forces (water, gravity) first, starting from the top down to protect the home’s entire systemic integrity.
The allure of an old home is undeniable. You see the character, the history, the potential. You imagine restoring its former glory. But as a forensic structural engineer, I see something else first: a complex system of forces, stresses, and potential failure points. Homeowners fall in love with aesthetics, but they are financially ruined by physics. They budget for new kitchens and updated bathrooms, but their dreams are shattered by sagging floors, crumbling foundations, and walls that were never meant to be moved.
The common advice is to “get a good inspection” and “have a contingency fund.” This is dangerously simplistic. An inspection is a snapshot in time, and a standard contingency fund is a blind guess. The true defense against a money pit is adopting a new mindset. It’s about learning to read the subtle language of a house in distress—to perform your own failure forensics. It’s understanding that a crack above a door isn’t just a cosmetic issue; it’s a distress signal from a foundation in trouble. It’s knowing that a musty smell in the basement could be the sound of your budget being eaten alive by rot you can’t even see yet.
This guide is not about scaring you away from your dream home. It’s about arming you with the realistic, safety-first perspective of an engineer. We will dissect the most common and costly hidden defects, teach you how to quantify your financial risk with precision, and establish a clear order of operations for repairs. Forget the romantic vision for a moment; it’s time to assess the structural reality. Your financial future depends on it.
To navigate these risks effectively, this guide breaks down the critical areas of inspection and financial planning. The following sections will equip you with the knowledge to identify major red flags and structure your budget accordingly.
Summary: Budgeting for Unforeseen Structural Defects in Old Homes
- Why Cracks Above Door Frames Suggest Foundation Settlement?
- How to Spot Painted-Over Water Damage in Basements?
- 10% or 30%: How Much Contingency Fund Do You Really Need for a 1950s House?
- The “Simple Wall Removal” That Can Collapse Your Second Floor
- In What Order Should You Fix Foundation, Roof, and Walls?
- The Floor Rot Signs That Mean You Should Turn Back Immediately
- The “Cash Trap” Risk of Owning Physical Property During a Recession
- Construction Efficiency: Delivering Projects on Time Without Cutting Corners?
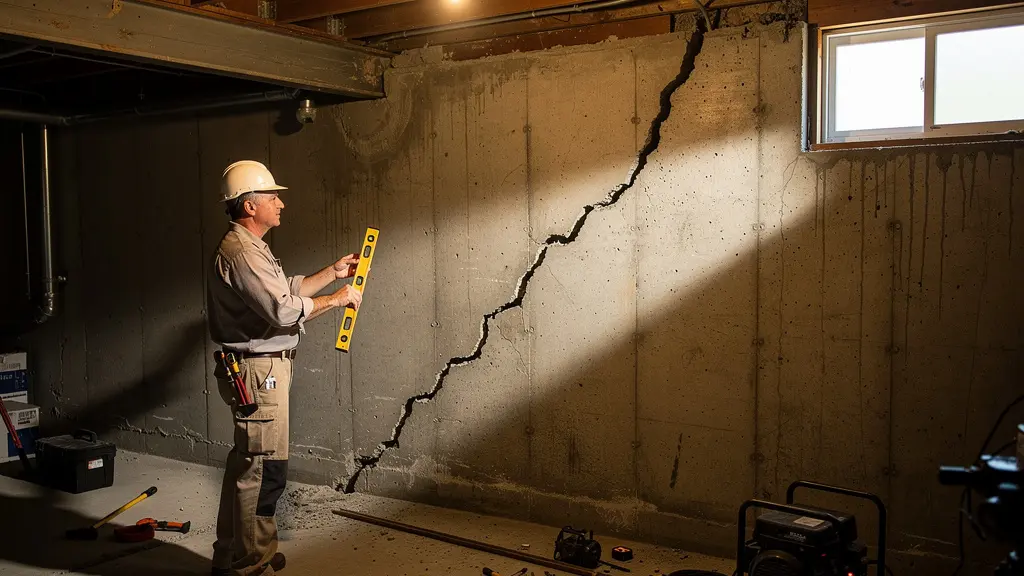
Why Cracks Above Door Frames Suggest Foundation Settlement?
That diagonal crack running up from the corner of a door or window is one of the most dismissed and most telling signs of structural distress. Homeowners paint over it, calling it “normal settling.” There is nothing normal about it. It is the house screaming that its foundation is moving unevenly. This movement, or differential settlement, puts immense stress on the rigid structure of your home. Since door and window openings are the weakest points in a wall, the stress is released there in the form of a crack.
Understanding the type of crack is the first step in failure forensics. A thin, vertical crack is often related to material shrinkage and is less concerning. A diagonal crack wider than 1/4 inch, especially one that is wider at the top than the bottom, is a classic indicator that one part of your foundation is sinking faster than the other. Other symptoms will follow: doors will begin to stick or won’t latch properly because their frames are being pulled out of square. You may also see corresponding cracks in the exterior brickwork or the foundation itself.
Do not ignore this. The process of monitoring is critical. Mark the endpoints of the crack with a pencil and date it. Measure its width. If you observe it growing over a few months, you are witnessing an active structural problem. While minor crack repair can be relatively inexpensive, addressing the underlying foundation issue is not. Major repairs involving piers or underpinning can quickly escalate into thousands of dollars. That crack is the first signal of a potentially massive budget item.
How to Spot Painted-Over Water Damage in Basements?
Water is the single most destructive force to a house, and the basement is where it stages its most devastating attacks. A savvy but unscrupulous seller knows that a fresh coat of “waterproofing” paint can mask a history of leaks. Your job is to see through this disguise. Never trust a freshly painted basement wall; instead, use your senses and a few key tools to uncover the truth.
First, trust your nose. A persistent, musty, earthy smell is the unmistakable scent of mold and mildew, which paint cannot hide. Mold is a direct result of moisture, and an analysis of water damage timelines shows that mold begins growing within 24 to 48 hours of a water event. Second, use light as a forensic tool. Turn off the overhead lights and use a powerful flashlight. Hold it parallel to the wall, creating what’s called “raking light.” This technique reveals every imperfection. Look for subtle bubbling, peeling, or a chalky, crystalline substance called efflorescence. These are salts left behind as moisture evaporates through the concrete or masonry, a sure sign of past or present water intrusion.
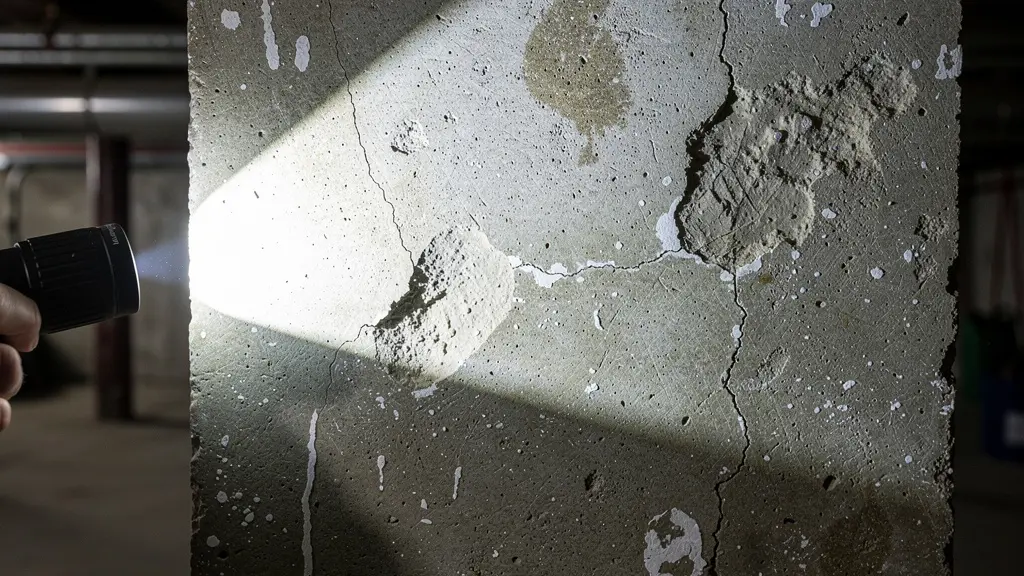
As the image demonstrates, this raking light technique exposes what direct light conceals. For a more definitive test, invest in a moisture meter. For as little as $30, these devices can detect elevated moisture levels behind a surface that looks and feels dry. A reading above 19% in wood framing or high humidity readings are major red flags. A seller might paint over a stain, but they can’t hide the physics of moisture from a meter.
10% or 30%: How Much Contingency Fund Do You Really Need for a 1950s House?
The “10% contingency” rule is one of the most dangerous pieces of generic advice in real estate. For a modern home with few unknowns, it might suffice. For a house built in the 1950s, it’s a recipe for financial disaster. A proper contingency isn’t a single percentage; it’s a risk-adjusted fund based on the specific age, systems, and known issues of the property. For older homes, this figure should start at 15-20% and climb from there.
Why so high? A 1950s house is a minefield of potential “surprises” that are expensive to remediate. The wiring might be antiquated, the plumbing could be galvanized steel on its last legs, and there’s a high probability of finding hazardous materials like asbestos in flooring, insulation, or pipe wrap. Each of these represents a significant, non-negotiable cost. Furthermore, a foundation problem is not a minor expense; a recent study shows the national average for foundation repairs has reached $5,100, with major work easily exceeding $10,000.
To budget intelligently, you must think in layers. Start with a base percentage and add to it for each specific risk factor. The following matrix, based on data from renovation experts, provides a more realistic framework. As a professional analysis from specialists in historic home renovations makes clear, the older the home, the greater the unknown.
| House Age | Base Contingency | Risk Multipliers | Recommended Total |
|---|---|---|---|
| Built 1920-1950 | 10-15% | +5% for knob-and-tube wiring +7% for galvanized plumbing +10% for structural changes |
15-30% |
| Built 1950-1980 | 10% | +5% for asbestos presence +5% for aluminum wiring +7% for foundation issues |
10-22% |
| Built after 1980 | 5-10% | +3% for moisture issues +5% for major systems replacement |
5-15% |
Using this matrix, a 1950s house with suspected foundation issues and plans for structural changes doesn’t need a 10% fund; it needs a fund approaching 25-30% of the total project cost. This isn’t pessimism; it’s financial realism.
The “Simple Wall Removal” That Can Collapse Your Second Floor
The dream of an open-concept living space is powerful, but it’s also the source of some of the most catastrophic and expensive DIY failures. The phrase “I’ll just take this wall out” should send a chill down the spine of any old-home buyer. The critical mistake is failing to distinguish between a simple partition wall and a load-bearing wall. Removing the latter is like kicking out a leg from under a table—the result is a sudden, disastrous collapse of everything it supports, including your second floor and roof.
A load-bearing wall is a key component of the home’s structural skeleton. It carries the weight (or “load”) from the elements above it—joists, upper floors, the roof—and transfers that load down to the foundation. In older homes, what seems like an inconveniently placed wall is often a core part of this system. Removing one without properly redirecting its load with a correctly sized beam and support columns is not a renovation mistake; it’s an act of structural vandalism. The cost to fix such a blunder is immense, as the structural reinforcement typically costs $1,000 to $3,000 per pier or support point required to correct the damage.
While the only 100% certain method is to consult a structural engineer, you can perform preliminary checks to identify likely load-bearing walls. This simple audit can prevent a catastrophic mistake before it happens. If your investigation points to any of these signs, stop immediately and call a professional.
Your Action Plan: Load-Bearing Wall Identification
- Check joist direction: In the basement or attic, observe the direction of the floor or ceiling joists. A wall that runs perpendicular to the direction of the joists is very likely to be load-bearing.
- Identify central stacks: Look for walls that are stacked directly on top of walls or support beams on the floor below them, running continuously down to the foundation.
- Use a stud finder: Scan the wall for studs. While most walls have studs 16 or 24 inches apart, a load-bearing wall may have thicker, multi-stud assemblies at certain points to handle more weight.
- Look for roof ridges: A wall located directly under the central ridge of the roof is often a primary load-bearing element supporting the roof structure.
- Examine wall orientation: Interior walls running parallel to the exterior walls are often non-load-bearing partitions, while those running perpendicular are more likely to be structural.
In What Order Should You Fix Foundation, Roof, and Walls?
When faced with multiple major issues, homeowners often fix what seems most urgent or what’s most visible. This is a critical error. The correct approach is “structural triage,” which prioritizes repairs based on the flow of destructive forces, not cosmetic appearance. For any house, this means you must work from the top down. The principle is simple: secure the building’s envelope from water first, then stabilize its base, and only then address the cosmetic issues in between.
The correct sequence is almost always: 1. Roof, 2. Foundation, 3. Walls. Why? Because a leaking roof is the number one cause of foundation failure. As one home inspector highlights in a case study on the topic, poor roof drainage from clogged gutters is the most common external cause of basement moisture. Rainwater cascades down exterior walls, saturating the soil directly against your foundation. This creates immense hydrostatic pressure that pushes against foundation walls, turning hairline cracks into major structural breaches. Fixing a $5,000 foundation problem before you’ve fixed the $500 gutter issue that’s causing it is like mopping the floor while the sink is still overflowing. You are treating the symptom, not the disease.
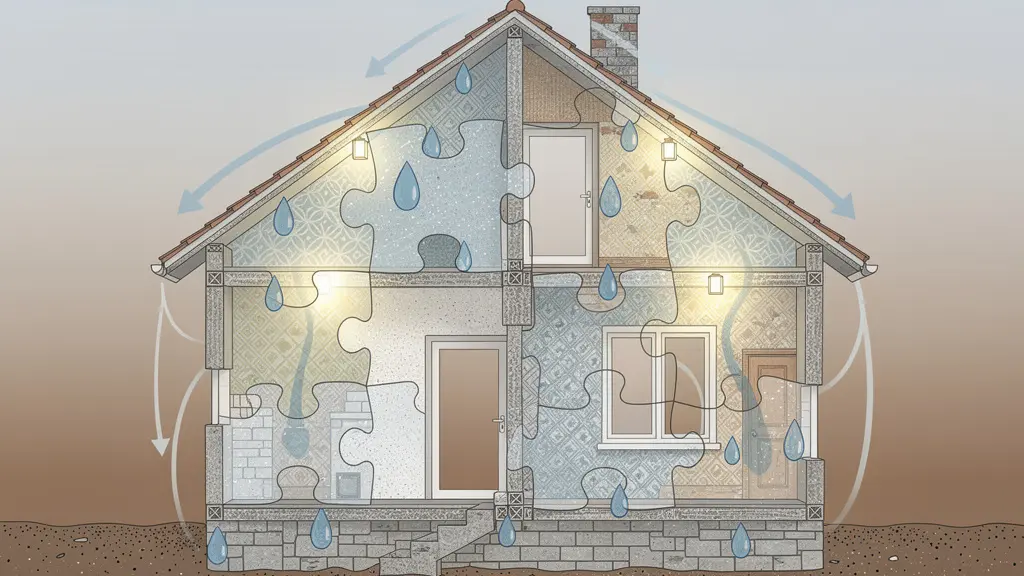
Think of it as a destructive load path. Water enters at the highest point and, thanks to gravity, travels to the lowest, causing damage at every level along the way. By first ensuring the roof and gutters are perfectly sealed and directing all water far away from the house, you eliminate the primary force attacking your foundation. Once the foundation is no longer under assault from excess moisture, you can proceed with any necessary repairs to stabilize it. Only after the building’s hat (roof) and boots (foundation) are sound should you worry about fixing cracks in the walls or other interior, largely cosmetic, damage.
The Floor Rot Signs That Mean You Should Turn Back Immediately
Some problems are fixable. Others are a clear signal that the house is a financial black hole from which you may never recover. Widespread floor rot falls squarely into the second category. This isn’t just a cosmetic issue of replacing some floorboards; it’s a sign of a deep, systemic failure of moisture management that has compromised the very skeleton of the house. Finding this should trigger your “walk away” protocol.
The signs can be subtle at first. A “spongy” or “bouncy” feeling underfoot, especially near exterior walls, bathrooms, or under windows, is a major red flag. This indicates that the subfloor or, even worse, the floor joists that support it have lost their structural integrity due to rot. You might also notice sagging or uneven floors. In a basement or crawlspace, probe any exposed wood joists (especially the sill plate resting on the foundation) with a screwdriver. If the wood is soft, crumbles, or the screwdriver sinks in easily, you are looking at advanced decay. The costs for this kind of damage are astronomical, as water damage restoration can easily run into tens of thousands for severe issues.
This is where you must be brutally objective. The “Point of No Return” isn’t just a feeling; it can be calculated. First, get a professional estimate for not only replacing the rotted floors and joists but also for fixing the root cause—be it failed drainage, a cracked foundation sill, or leaking plumbing. If this total estimated cost exceeds 20% of the home’s post-repair value, you are officially in money-pit territory. At this threshold, the financial and emotional toll of the project will almost certainly outweigh any potential reward. This 20% rule is your emergency brake. Use it to save yourself from a project that is destined to fail before it even begins.
The “Cash Trap” Risk of Owning Physical Property During a Recession
The risk of an old house isn’t just in the cost of repairs; it’s in the timing. Owning a physical, illiquid asset like a fixer-upper during a recession creates a dangerous financial scenario I call the “Cash Trap.” Imagine this: the economy enters a downturn, your job security is less certain, and banks tighten their lending standards. It is at this exact moment that you discover a major structural defect requiring an immediate $15,000 cash outlay. Your asset (the house) may be dropping in value, and your ability to borrow against it (or get any loan) has evaporated. You are trapped.
This is not a hypothetical risk. It’s a predictable consequence of combining an asset that requires constant cash input with an economic environment where cash is scarce. Analysis shows that for major renovations, major structural changes can consume 40% to 60% of a total renovation budget. If you haven’t planned for this, you could be forced to sell the property at a significant loss or, worse, live in an unsafe home because you lack the liquidity to fix it. The contingency fund is your first line of defense, but a proactive financial strategy is the second.
Financial experts offer a key strategy to mitigate this trap: secure a Home Equity Line of Credit (HELOC) *before* you need it. When the economy is strong and your home has value, open a HELOC but don’t draw on it. Think of it as a pre-approved emergency fund. When the unexpected structural failure occurs during a recession, you have immediate access to the necessary capital without having to navigate a hostile lending environment. This single move decouples the timing of your repair needs from the volatility of the economic cycle, providing a critical buffer against the cash trap.
Key Takeaways
- Structural triage is essential: Always fix issues from the top down (roof first, then foundation) to stop the source of damage.
- A contingency fund is not a flat 10%. It must be risk-adjusted for the home’s age and known issues, often requiring 20-30%.
- Learn to read the signs: Diagonal cracks, musty smells, and subtle paint bubbling are not cosmetic flaws; they are urgent distress signals.
Construction Efficiency: Delivering Projects on Time Without Cutting Corners?
Once you’ve assessed the risks and committed to a project, your success shifts from your diagnostic skills to your ability to hire the right professionals. The goal is efficiency, but not at the cost of safety or quality. In the world of old homes, “efficiency” doesn’t mean speed; it means having a contractor who is an expert in anticipating problems and managing the budget transparently when they arise. Cutting corners on an old home—especially on structural work—doesn’t save money, it merely postpones a more expensive failure.
Your primary task is to vet contractors specifically for their experience with unforeseen conditions. A contractor who primarily builds new homes is unprepared for the realities of a 70-year-old structure. You need someone who speaks the language of “contingency usage” and “change orders” fluently. Some experts recommend that for older buildings with many unknowns, contingencies of up to 25% may be required, and your contractor must be comfortable managing this. When interviewing potential hires, go beyond asking for references. Ask them targeted, scenario-based questions about how they handle the inevitable surprises.
Here are critical questions to ask to separate the experienced old-home renovators from the rest:
- Tell me about the biggest unforeseen structural issue you found on a job and how you handled the budget and timeline with the client.
- What is your formal process for documenting an issue, presenting solutions, and getting approval for using the contingency fund?
- How do you handle the discovery of hazardous materials like asbestos or lead paint mid-project? What does that process look like?
- Can you provide me with anonymized examples of change orders from past old-home projects so I can understand how you document costs?
- What percentage of contingency do you typically recommend for a home of this age, and why?
A good contractor’s answers will be detailed and process-oriented. They will emphasize documentation, communication, and client approval. A bad contractor will be vague, downplay the risks, or suggest they “just handle it.” Your choice of contractor is your final and most important budgetary decision. Choose the one who plans for the worst, not the one who promises the best.
By adopting this forensic, safety-first mindset, you transform yourself from a hopeful buyer into an empowered owner. You can now assess risks accurately, budget with intelligence, and hire with confidence. The next logical step is to begin the vetting process for a structural engineer or a highly experienced old-home contractor in your area.